Thank you for visiting SNEWPapers!
Sign up free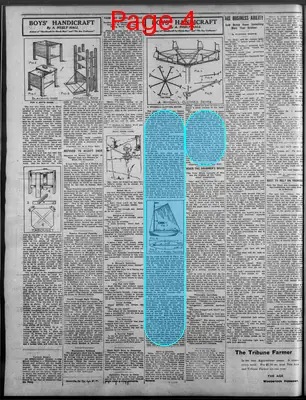
Literary
November 23, 1912
Spirit Of The Age
Woodstock, Windsor County, Vermont
What is this article about?
Detailed instructions for building a windmill-powered clothes dryer using wooden arms, toy yacht hulls with sails as paddles, and wire braces, designed as a practical toy for laundry drying, copyrighted 1912 by A. Neely Hall.
Merged-components note: Image illustrates the clothes dryer handicraft article.
Clipping
OCR Quality
75%
Good
Full Text
The model from which the clothes dryer shown in Fig. 1 was patterned has been in use for a number of years, and except when not a breath of air is stirring, its little fleet of yachts, whose sails form the paddles of the windmill, sail around the circular course continuously. The best feature of this windmill is its combination with the clothes dryer, which makes it a practical toy that will serve the laundress excellently on wash day.
If there is a clothes post in the center of the yard, its top may be used for a support, otherwise, you will have to put up a post. A two-by-four will serve the purpose for this. Set it about 18 inches into the ground, and then brace it at the base with diagonal pieces.
Strips one inch thick and two inches wide may be used for the arms of the windmill dryer, but if you can get pieces two inches thick they will of course, be so much stronger. Cut the arms six feet long, and bevel their ends as in Fig. 3 (A), cutting the lower ends to fit the base board, B, and the upper ends to fit the blocks, C. The upper end of the arms should be about two feet higher than the lower end, which will determine the angle of the bevels. Cut the base block, B, eight inches square, and bore a three-fourths-inch hole through its center for the king-bolt, D, and cut the blocks, C, about two and one-half inches wide by ten inches long. Nail blocks, C, to the upper ends of the arms, and drive the nail, E, into each block near the inner end. Either bolt or screw the lower ends of the arms to Block, B, placing the arms as shown in Fig. 2. Fasten with only one bolt or screw, first then connect nails, E, on each opposite pair of arms with the wire brace, F (Fig. 3). These wires should be cut about one foot longer than the distance between the nails and be twisted back on themselves at one end, as shown in Figs. 3 and 4; then a nail can be slipped through one of the loops and be used as a lever to twist the wire to take up the slack, in adjusting the arm ends to the proper heights. The distances between the arm ends should be carefully measured, and the arms shifted from side to side until these are all the same; then the lower end should be fastened securely with a second bolt or screw.
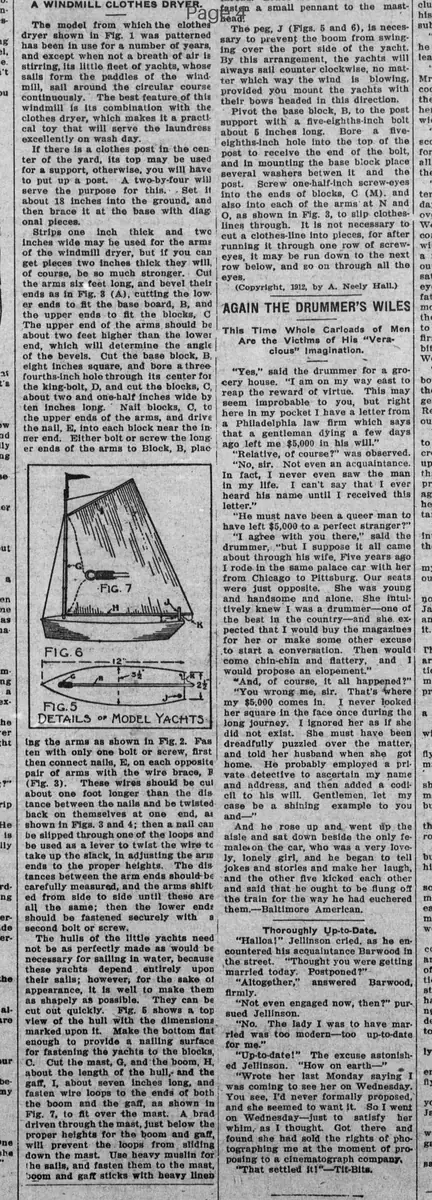
The hulls of the little yachts need not be as perfectly made as would be necessary for sailing in water, because these yachts depend entirely upon their sails; however, for the sake of appearance, it is well to make them as shapely as possible. They can be cut out quickly. Fig. 5 shows a top view of the hull with the dimensions marked upon it. Make the bottom flat enough to provide a nailing surface for fastening the yachts to the blocks, C. Cut the mast, G, and the boom, H, about the length of the hull and the gaff, I, about seven inches long, and fasten wire loops to the ends of both the boom and the gaff, as shown in Fig. 7, to fit over the mast. A brad driven through the mast, just below the proper heights for the boom and gaff will prevent the loops from sliding down the mast. Use heavy muslin for the sails, and fasten them to the mast, boom and gaff sticks with heavy linen thread.
The peg, J (Figs. 5 and 6), is necessary to prevent the boom from swinging over the port side of the yacht. By this arrangement, the yachts will always sail counter clockwise, no matter which way the wind is blowing, provided you mount the yachts with their bows headed in this direction.
Pivot the base block, B, to the post support with a five-eighths-inch bolt about 5 inches long. Bore a five-eighths-inch hole into the top of the post to receive the end of the bolt, and in mounting the base block place several washers between it and the post. Screw one-half-inch screw-eyes into the ends of blocks, C (M), and also into each of the arms at N and O, as shown in Fig. 3, to slip clothes-lines through. It is not necessary to cut a clothes-line into pieces, for after running it through one row of screw-eyes, it may be run down to the next row below, and so on through all the eyes.
(Copyright, 1912, by A. Neely Hall.)
If there is a clothes post in the center of the yard, its top may be used for a support, otherwise, you will have to put up a post. A two-by-four will serve the purpose for this. Set it about 18 inches into the ground, and then brace it at the base with diagonal pieces.
Strips one inch thick and two inches wide may be used for the arms of the windmill dryer, but if you can get pieces two inches thick they will of course, be so much stronger. Cut the arms six feet long, and bevel their ends as in Fig. 3 (A), cutting the lower ends to fit the base board, B, and the upper ends to fit the blocks, C. The upper end of the arms should be about two feet higher than the lower end, which will determine the angle of the bevels. Cut the base block, B, eight inches square, and bore a three-fourths-inch hole through its center for the king-bolt, D, and cut the blocks, C, about two and one-half inches wide by ten inches long. Nail blocks, C, to the upper ends of the arms, and drive the nail, E, into each block near the inner end. Either bolt or screw the lower ends of the arms to Block, B, placing the arms as shown in Fig. 2. Fasten with only one bolt or screw, first then connect nails, E, on each opposite pair of arms with the wire brace, F (Fig. 3). These wires should be cut about one foot longer than the distance between the nails and be twisted back on themselves at one end, as shown in Figs. 3 and 4; then a nail can be slipped through one of the loops and be used as a lever to twist the wire to take up the slack, in adjusting the arm ends to the proper heights. The distances between the arm ends should be carefully measured, and the arms shifted from side to side until these are all the same; then the lower end should be fastened securely with a second bolt or screw.
The hulls of the little yachts need not be as perfectly made as would be necessary for sailing in water, because these yachts depend entirely upon their sails; however, for the sake of appearance, it is well to make them as shapely as possible. They can be cut out quickly. Fig. 5 shows a top view of the hull with the dimensions marked upon it. Make the bottom flat enough to provide a nailing surface for fastening the yachts to the blocks, C. Cut the mast, G, and the boom, H, about the length of the hull and the gaff, I, about seven inches long, and fasten wire loops to the ends of both the boom and the gaff, as shown in Fig. 7, to fit over the mast. A brad driven through the mast, just below the proper heights for the boom and gaff will prevent the loops from sliding down the mast. Use heavy muslin for the sails, and fasten them to the mast, boom and gaff sticks with heavy linen thread.
The peg, J (Figs. 5 and 6), is necessary to prevent the boom from swinging over the port side of the yacht. By this arrangement, the yachts will always sail counter clockwise, no matter which way the wind is blowing, provided you mount the yachts with their bows headed in this direction.
Pivot the base block, B, to the post support with a five-eighths-inch bolt about 5 inches long. Bore a five-eighths-inch hole into the top of the post to receive the end of the bolt, and in mounting the base block place several washers between it and the post. Screw one-half-inch screw-eyes into the ends of blocks, C (M), and also into each of the arms at N and O, as shown in Fig. 3, to slip clothes-lines through. It is not necessary to cut a clothes-line into pieces, for after running it through one row of screw-eyes, it may be run down to the next row below, and so on through all the eyes.
(Copyright, 1912, by A. Neely Hall.)
What sub-type of article is it?
Instructional Guide
Diy Article
What keywords are associated?
Windmill
Clothes Dryer
Toy Yachts
Diy Construction
Sails Paddles
Laundress
1912
What entities or persons were involved?
A. Neely Hall
Literary Details
Author
A. Neely Hall
Subject
Construction Of A Windmill Powered Clothes Dryer Using Toy Yachts
Form / Style
Prose Instructions With References To Figures
Key Lines
The Model From Which The Clothes Dryer Shown In Fig. 1 Was Patterned Has Been In Use For A Number Of Years, And Except When Not A Breath Of Air Is Stirring, Its Little Fleet Of Yachts, Whose Sails Form The Paddles Of The Windmill, Sail Around The Circular Course Continuously.
The Best Feature Of This Windmill Is Its Combination With The Clothes Dryer, Which Makes It A Practical Toy That Will Serve The Laundress Excellently On Wash Day.
By This Arrangement, The Yachts Will Always Sail Counter Clockwise, No Matter Which Way The Wind Is Blowing, Provided You Mount The Yachts With Their Bows Headed In This Direction.